Recently I have been drawn before the commission of a local telco bureau, to take part in an amateur radio examination, by a fellow attendee. The motivation? Well, each time I tinkered with a radio, I always skipped scanning of “ham” bands as I never really found debates regarding signal reports, the weather or their next planned doctor’s visits to be of particular interest, focusing rather on the oddities on shortwave, military and numbers stations, or listening to commercial traffic on a handheld. However, the interesting stuff is now largely encrypted digital, or has moved to satellites. So, perhaps it was time to blow some dust off the radios again, and undertake some sizeable bureaucracy, in order to be able to press the transmit button “legally” now. A little bit cringey it is, fidgeting with antennas and connecting modern information technology to a… radio, in the year of our Lord 2023, when you can have internet on the North Pole. Rant over – time to broaden the interests and join the aging hobby with an already aging myself, I’ll fit right in!
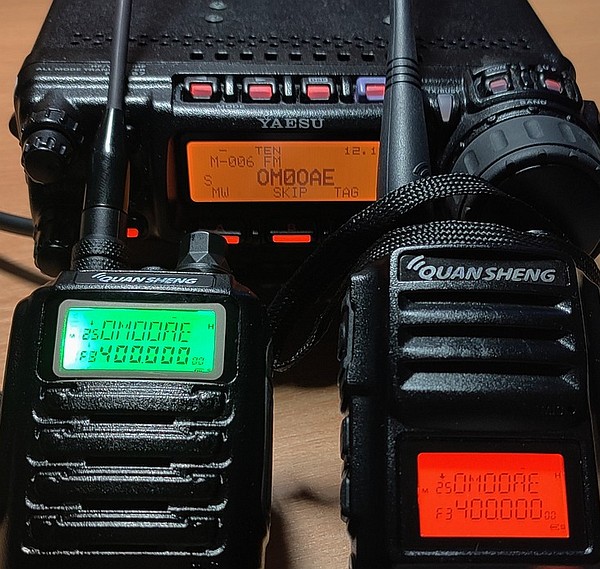 And the old Quan’s before the cheap SDR-based K5 became popular
So, to celebrate my novice license (hurray!), I have decided to do a small project for the Yaesu that I managed to get brand new a couple of years ago before they discontinued production. It was the European model, so apart from unlocking out of band transmit (tsk tsk) and replacing the N antenna connector with an SO239 just like they have in Japanese and American variants, I went forward with an interface cable. Of course there were some Yaesu cables as accessories, however I couldn’t find these in the cardboard box my “rig” came with, and there’s no proper “ham” radio without homebrewing!
 Yaesu FT-857 interface cable schematic.
Connects into the microphone port, allows PC (CAT protocol) control, PTT control and CW keying over RTS/DTR, external audio/PTT switch inputs.
For galvanic isolation, optocouplers and audio transformers can be used.
This interface is based on a circuit from K6XX, improved to allow CW keying thru DTR and software such as CwType or Ham Radio Deluxe (on the FT857, CAT control alone would only switch PTT and not do keying). It utilizes the 8P8C (RJ45) microphone port behind the front panel, freeing up the back panel CAT/Linear/Tuner 8pin mini-DIN for connection with an amplifier or tuner.
With this setup, no audio interfaces are required, the transceiver can be plugged in to regular PC sound, and if computer CW keying is desired, a 3.5mm audio cable can be connected between the rear-panel KEY jack of the Yaesu and the “KEY out” of the interface cable, without the use of hardware/USB keyers or other accessories. Of course I could use a keyer paddle or a straight key, however my opinion towards learning Morse code, used only in “ham” radio nowadays, see first paragraph of article, and – shall the discussion go into decoding of weak signals, I trust information technology more than any human ears 🙂
An RJ45 (Ethernet) patch cable or plug is much easier to come by in your “hamshack” than an 8-pin mini DIN for the CAT interface… and the swearing involved while trying to solder hairthin wires to it. Plus, a simple Ethernet splitter/passthrough adaptor can be used to install the interface once and forget about it, not having to detach the front panel to access the mic connector.
A little portable setup without the battery and antenna
For computer (CAT protocol) control, a 9-pin serial plug fits any PC serial interface, whether it’s any cheap USB to RS232 dongle, or in case of old computers, a direct serial port. Without a computer, the cable also allows to connect an external switch between receive and transmit and an external audio source, be it a microphone or some other audio output.
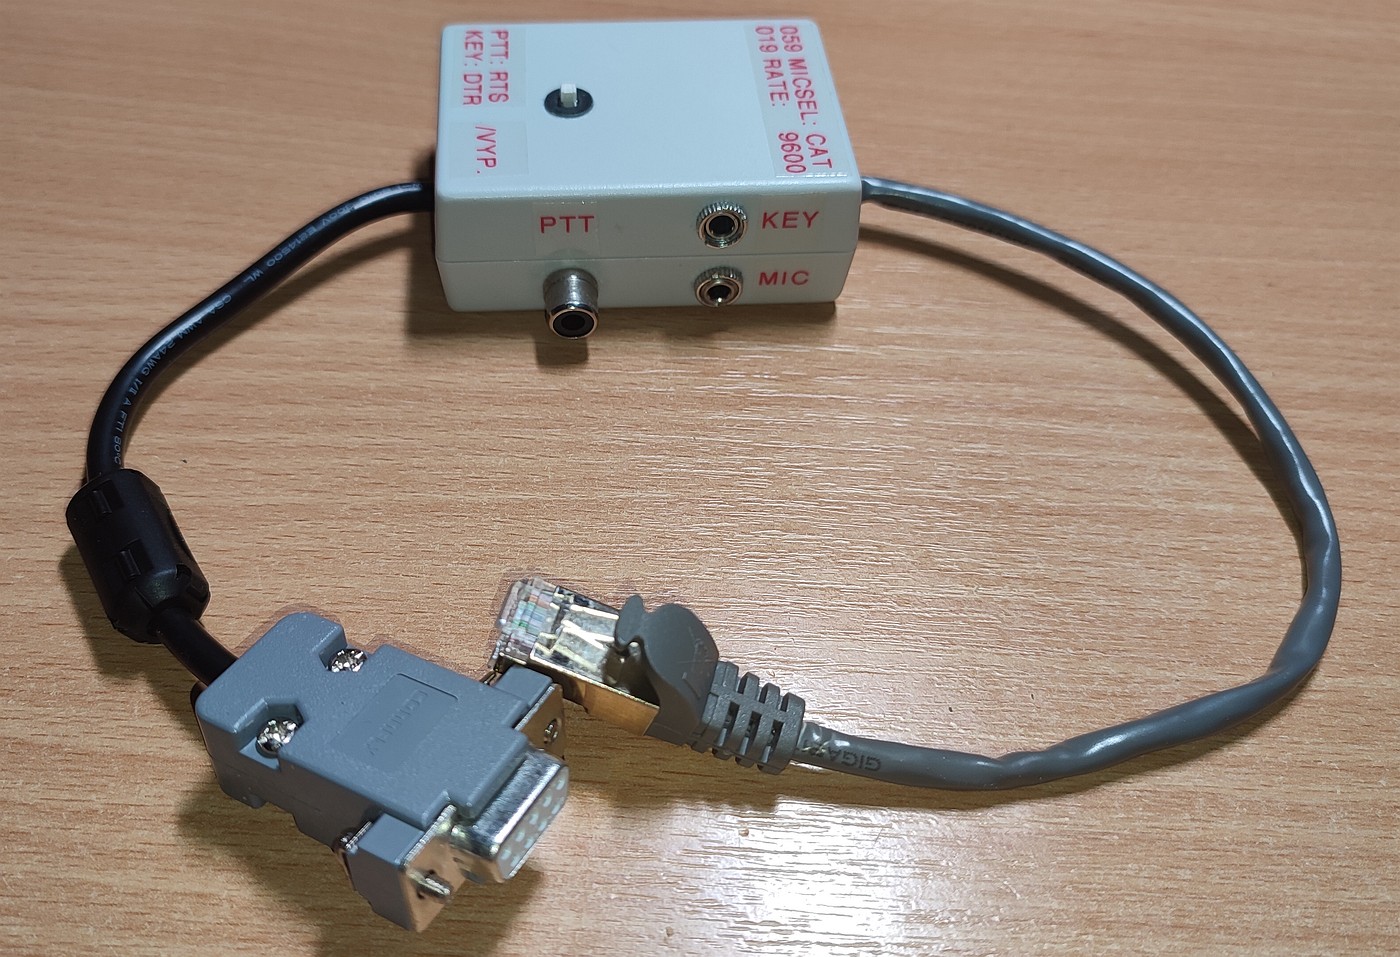 The interface cable itself.
The pushbutton to enable RTS/DTR for PTT/CW keying operation was added as the OS might probe these lines during reboot or port initialization, to avoid inadvertently switching from receive to transmit.
To use the interface, the Menu option 059 MICSEL is set to CAT (make sure option 001 EXT MENU is enabled to see this), and if using the interface together with the regular MH-31 mike or similar, this setting can be kept that way. The other required Menu option is the 019 CAT RATE, defaultly set to 4800 bps.
I recommend keeping it that way, as I have been getting some protocol errors on the higher baud rates – running a portable setup with no proper grounding will have to do something with it 🙂 Also there is no need for a high baud rate here, since that’s only the rate of the transceiver control, polled in regular intervals – not of any actual decoding, as that’s done by the CPU from the sound input.
For software CW keying, PTT is configured either through the RTS line, or thru the CAT protocol, and the KEY output thru the DTR line. Remember to push the button to activate these 2 lines and connect a 3.5mm audio cable between the back panel KEY jack on the Yaesu, and the KEY out of the interface. Done.
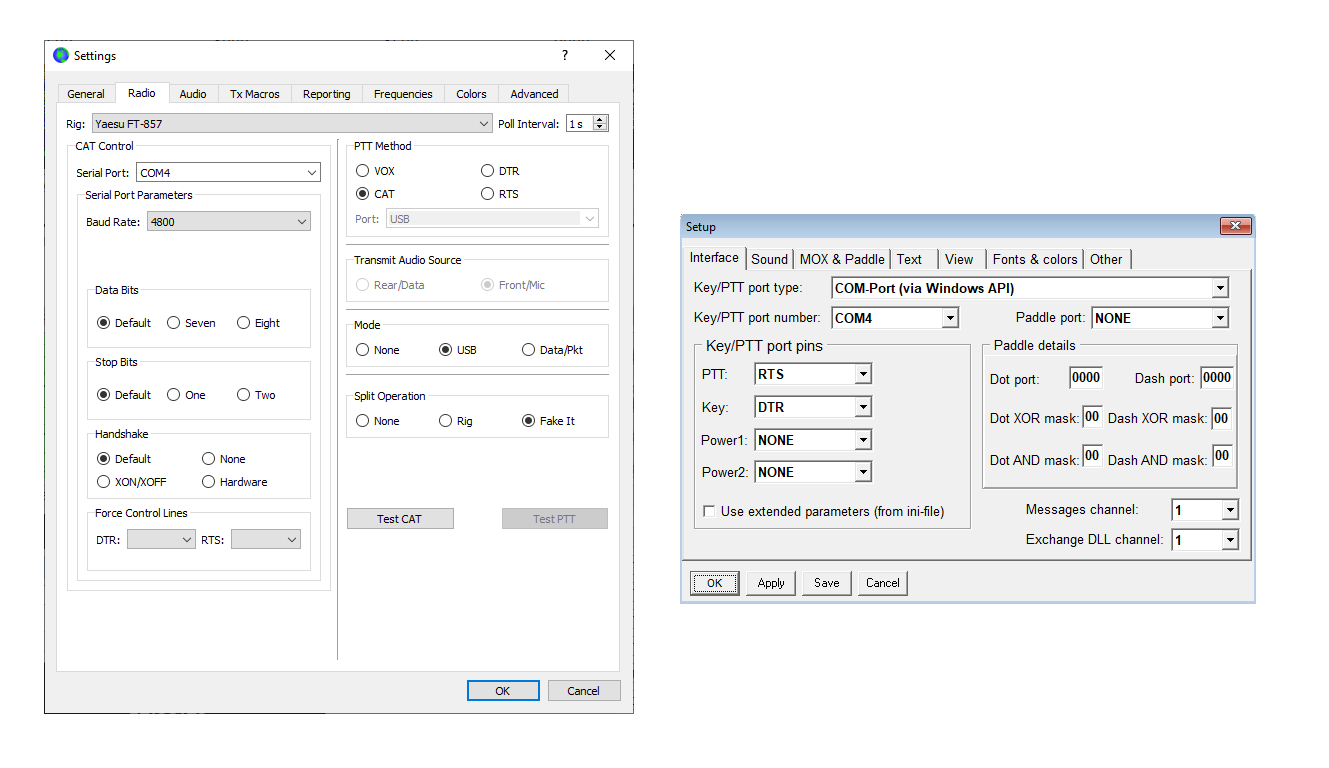 “Rig setup” for WSJT-X (FT8) and software CW keying thru CwType
To work with digital data modes, or process the transceiver’s audio output in some other way, there’s one connection missing that is not a part of the RJ45 mic connector: an RX “audio out” connection between the Yaesu and the PC line input. Again, a 3.5mm audio cable will do. There are actually two 3.5mm audio out jacks on the FT-857, one in the back “EXT SPKR”, designed to drive an external speaker as the name implies. The second jack is unmarked, located to the left of the removable front panel, and can be switched for a headphone output level by means of a small microswitch PH / SP, located inside. This is what I use:
 Unmarked audio output jack on the Yaesu, switched for a headphone output level (PH). Ugly white stickers added by me 🙂
However, this is not to be confused with the other, unmarked, jack connector located on the bottom of the front panel! That one is used for an optional analog meter – values shown are configured thru Menu options 060 MTR ARX SEL during receive, and 061 MTR ATX SEL during transmit.
This is a 0-1mA ammeter with a custom scale that can be ordered (or made DIY) on a certain “far eastern” marketplace as an accessory to the Yaesu. During transmitting, I use it to display an SWR reading, whilst displaying the input audio/mike modulation on the tiny LCD of the Yaesu.
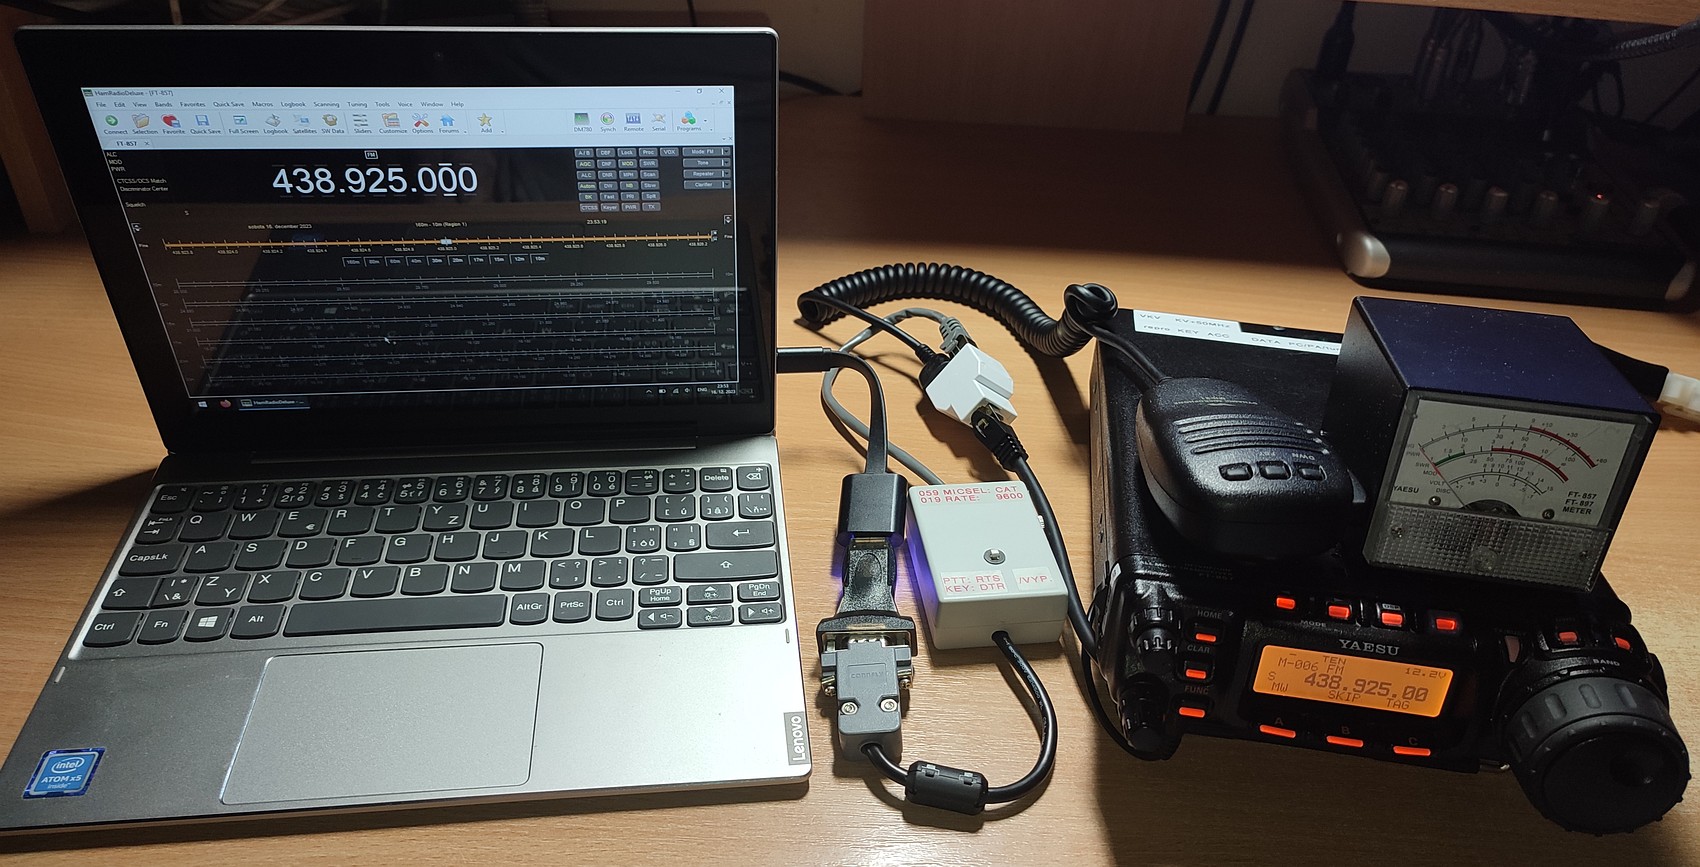
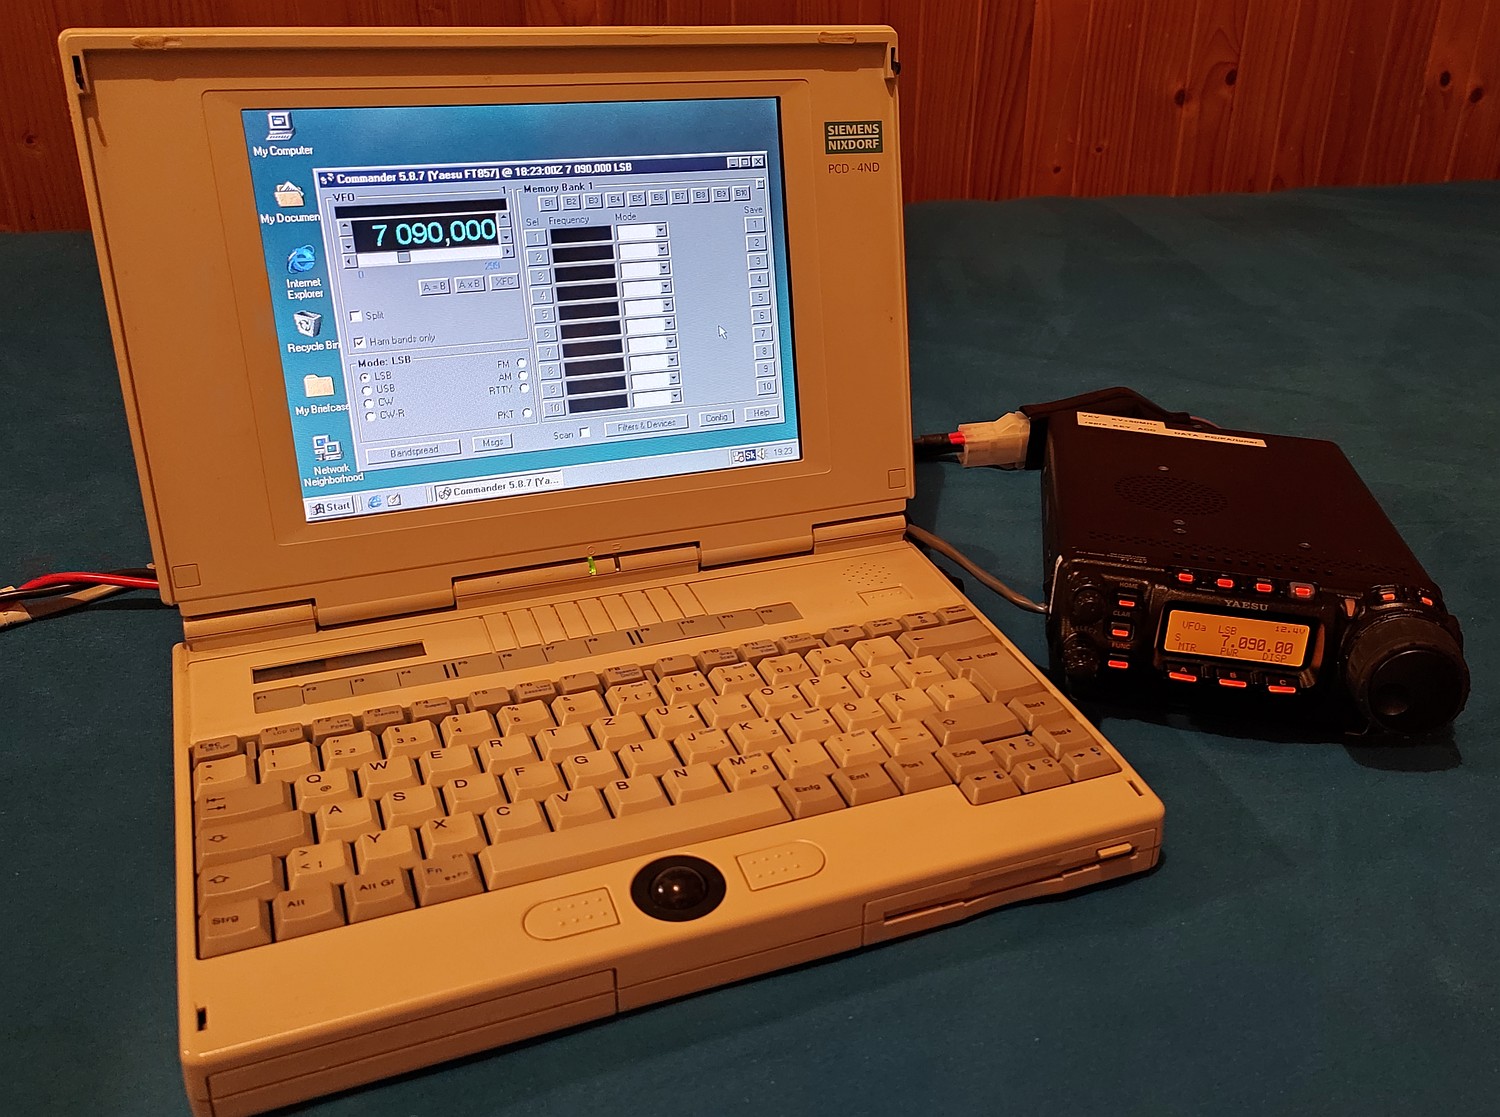 An old hobby can go along just fine with an old computer
With this cable and normal PC sound input I have successfully encoded and decoded both CW (CwGet/CwType) and FT8 (WSJT-X), of course a plethora of other data modes can be used such as SSTV or other AFSK, and combined with a CAT protocol application such as HRD, it can be used for automatic logging purposes.
However, due to hardware limitations of the Yaesu, using the packet radio mode (PKT) requires a separate different cable – it operates through the back side 6-pin “DATA” mini DIN which contains 2 data lines for 1200bps and 9600bps rates. The same goes for the DIG mode, as Yaesu will not transmit data-audio thru the mic port in this mode. As such, the radio has to be set to SSB – i.e. USB or LSB, depending on the working frequency and mode. Or FM or even AM, if you somehow prefer and your bandwidth regulations allow. 🙂
And of course, during transmit on single sideband, the output power depends on input modulation – the line out from the PC sound is to be set according to the MOD or ALC level observed, so the input signal is not overdriven nor too quiet. I use full input modulation with the RF power limited, if required, with the 075 RF POWER SET menu option. And, menu GAIN settings for each mode are best set once to the particular mike you use during voice transmissions.
And that’s about it, folks! Or should I rather, victor-yankee seventy-three delta-echo… nah, I’m on my webpage here.
Yeah, one more thing mentioned above: here’s the solder bridge (jumper) settings I use in this European variant; TX is still blocked within 0.1-1.7MHz… even though we can use 2200 meters (136kHz), who has a long-wave setup anyway. And the N for SO239 socket swap above 50MHz was quite straightforward: the frequency coverage of an FT-857 maxes out on 70cm – at that frequency you still don’t need to use a different type.
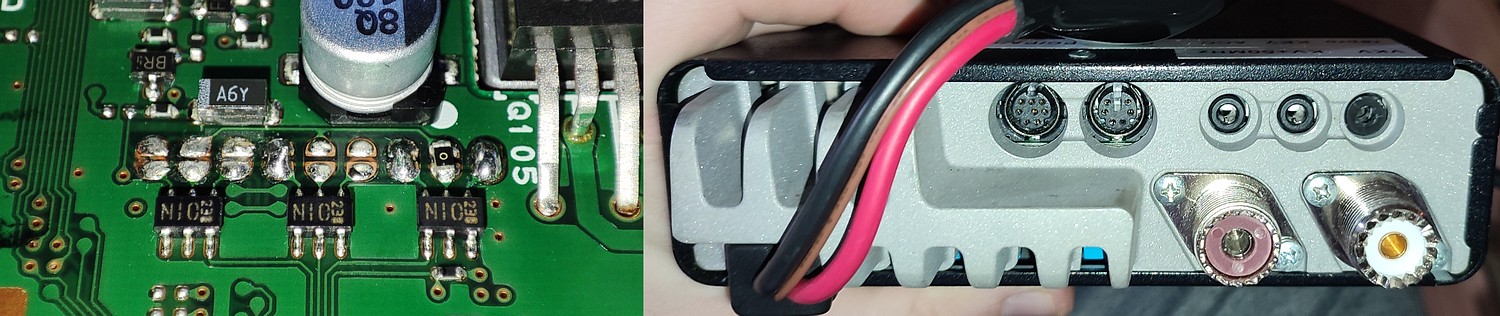 Solder-blobs for unlocked config + two identical antenna sockets of SO239 (PL259 plug) type