After receiving a donation of two nice X-ray intensifying screens from Mr. Máca, a Czech radiologist (many thanks!) in 2011, it wasn’t long before I got a hand on a real X-ray tube, obtained through barter trade, with some luck, too. Only then were my previous failed X-ray attempts with DY86‘s and 6VS-1‘s marked with success, at least!
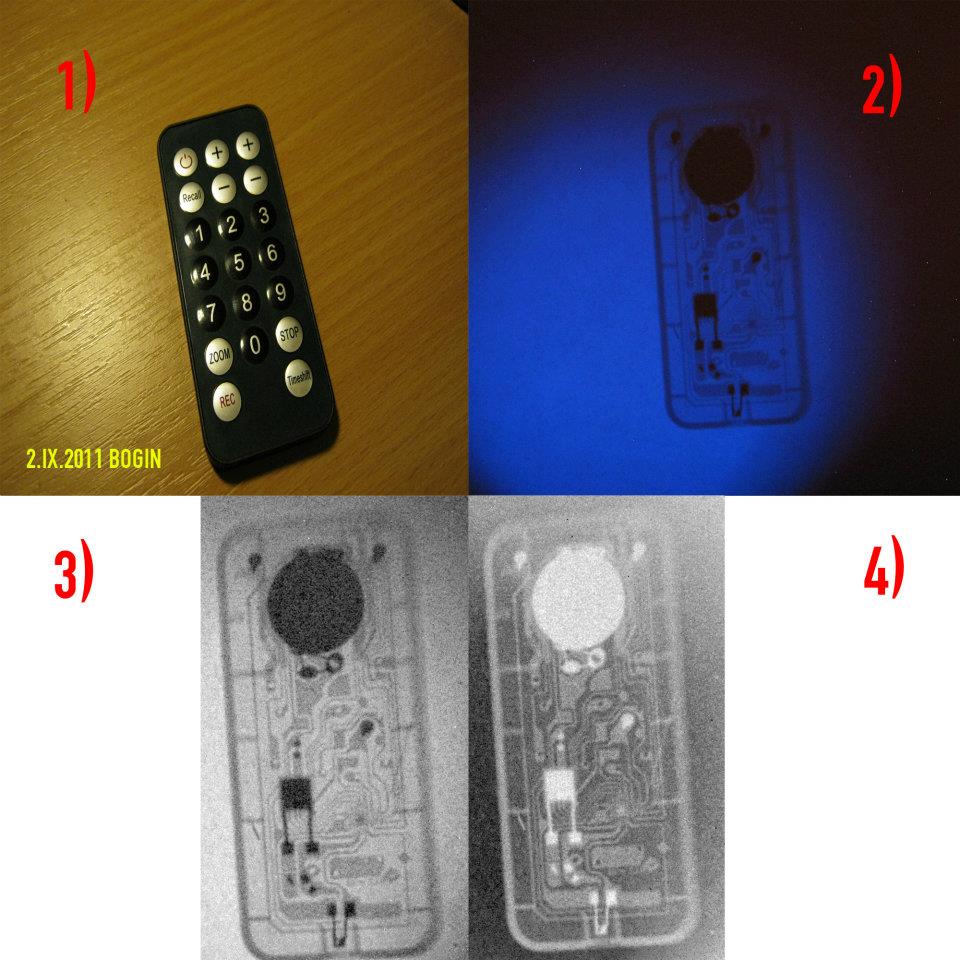
 First success: an MP3 player radiograph
Well of course I’m not going to teach you how it’s possible for you to X-ray your hand at home, step-by-step (that’d be one hell of a long article); only to disregard safety precautions and develop yourself burns afterwards; so rather than that I am going to mention the experience how my first working X-rays went through the building process. 🙂
 X-ray tube “Chirana” DOK-70, Czechoslovakia
Markings lost, Umax is 70 kV nevertheless.
-We made our own x-ray tubes back then!
To produce X-rays, one can go in cold- or hot-cathode tubes. Most cold cathode tubes as of nowadays are rare items which belong to your local museum, however, some were manufactured for schools as a physics teaching material. Combined with a Ruhmkorff inductor, these tubes generated copious amounts of X-rays enough to make a realtime radiograph on a zinc-sulfide-based fluorescent screen.
Hot-cathode X-ray tubes, also called “Coolidge tubes”, are used to generate X-rays to this date in hospitals, security and lab equipment, etc. These need to be heated up before operation and a more powerful supply than an induction coil is needed. They are also more sturdy, have stronger vacuum and can operate for much longer than the prehistoric cold-cathode ones.
 Intensifier screens DuPont Cronex RAPID (800)
Blue emitting and rare-earth based.
As I did not want to mess with a photosensitive film and developing it afterwards; I have chosen to photograph the intensifier screen – in dark – with a remotely-controlled camera, something like a flouroscope. The photo can be then converted to grayscale and made a negative on a computer.
An absolute minimum of 40 kilovolts, under load, is needed to make any more-or-less reasonable radiographs in real-time, or with short exposure time (up to 5 seconds). Many low powered drivers might give e.g. a voltage of 50 kilovolts when the arc strikes, however it falls down sharply at load /an arc, ionised air, is also a load/. So if you have a similar X-ray setup and you’re not getting any fluoroscopic pictures whatsoever, make a stabilized high voltage supply, decrease filament current (to decrease overall current draw) or increase input power (output kilovoltage directly, if you can).
40 kilovolts is enough to X-ray small plastic objects, 50-60kV for biological specimen and over 70-80 kilovolts for metallic things. Lesser energy X-rays are easily shielded out, but they also absorb themselves better (in tissues, e.g.) !
 The “digitalization” process
Now for the setup itself. Hadn’t been lucky to obtain a real, oil-submerged 120 kilovolt transformer, so I had to use some of the high voltage drivers I’ve made formerly. So: the main driver is my DST-driven ZVS; fed with 50 volts and the resonant capacitor tuned to 220 nF for approximately 50 kilovolts out (arc striked at 7.5cm). This was hooked directly to the anode. My cathode had been directly connected to ground and heated through a classic mains transformer through my triac phase regulator. Having a regulated filament supply is very crucial, since with this you affect the overall current draw from your HV supply. Be it too big and the output kilovoltage won’t be enough for radiographs, so you need to fiddle with this.
Most of these filaments need a few volts (not more than 4 or 5), AC or DC, at a few amps. Or, it is possible to heat it up as I did. Trial and error 🙂
 X-ray of a measuring tape
Then, the object to be X-rayed is placed between the anode window/main beam and the opened intensifying screen. A camera is then set with an appropriate exposure value and self-timer, then focused on the other side of the screen. For this setup I’ve used an exposure of 3 seconds and a self-timer of 10. After setting that up, I turn on the heater and immediately escape to a safe place, in my case I usually hide behind a wardrobe, or a concrete wall – with a proper radiometer on my neck, sensitive to soft X-rays (e.g. the IT-65), to determine whether its safe or not. And just before the camera strikes, high voltage is remotely turned on during the exposure process, and shut down immediately, along with heater supply, after the photo is done.
 Microchip
Now, I haven’t had a kilovoltmeter during the process, but the voltage on the tube (under load) had been, judging from the pictures’ contrast, no less than ca. 32 kV and no more than 40 kV, so if using a flyback supply, make some voltage headroom for your output, you won’t destroy an X-ray tube with excessive voltage easily. Or get a real x-ray transformer and rectifier. In such a case, invest also in shielding: 40-50keV is a lot easier to shield out than 150, let’s say. 🙂
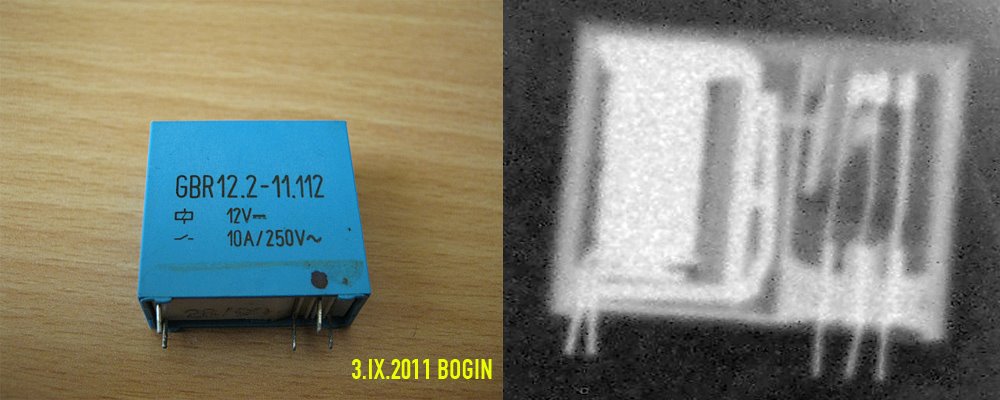 A relay, out of focus…
As for radiation protection, a classic Geiger counter with a metallic probe/Geiger tube is not going to tell anything about the energy of your rays. In addition, due to the design, it is going to show readings 10 to 10 000 times lower than they really are!
I suggest having a ionisation chamber-based meter handy (like the IT-65.. 🙂 ), plus you might need to remove any metallic/lead shielding, if present, in your meter.
For empirical values of general X-ray tubes, be sure to check out RadPro calculator, to give you a basic idea of the main beam’s radiation intensity. 🙂
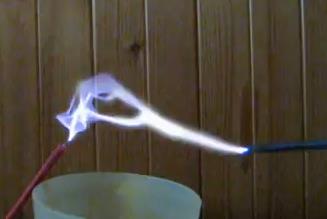 Flyback supply test (7.5 cm) with a modern
“draw-an-arc-and-see” approach
And that’s about size of it folks; enough said, I think. As you can see this article was not a guide, but rather a description of the setup itself. I really don’t suggest playing with X-rays if you aren’t informed how they work, how are they shielded and what advantages, disadvantages and dangers they pose.
Finally, if you got yourself lost in all that text, here’s a video of the whole setup. Watch and enjoy 🙂
Hi, what is the exact voltage/current have you used here for the cathod of the Chirana? I have tried
with 2V but it seems too low. Thanks.
Hi, the anode voltage was approximately 35-40 kV with a current of ~300uA (+-?). No exact measurements were made because of the poor results.
Sorry, I have misread.
For the heater I’ve used a sine wave chopper (triac light dimmer) combined with a low voltage transformer, and tuned it for the “best” picture.
Since the current was non-sinusoidal AC, I haven’t measured it as the meter would show nonsense.
Hi, ok for the anode, but for the cathod? How many volts/amps have you used?
Ehehe don’t worry 🙂 Ok, I know. I’m using only DC current… With another tube I have chose a value of 2 volts with 1.8 amps and it works.. But with this tube I have no results..
Right, it seems you need about 4 volts @ 3.5A DC to get anode current of approximately 200uA.
Great site and experiments-Ilike it.
I am trying to do these but I have some problems with finding intensifying scceen.
Will you contact me by mail pleasae
Hi, I’ve got mine from a fellow radiologist who has an ambulance, and while they were converting to digital radiography, they were getting rid of the old method.
It might sound crazy, but you can try your luck in the nearest hospital, they won’t chop your head off for asking – that’s what I did at first, and they instructed me to the guy I mentioned above.
IF that is not an option, try local or international auction sites. I reckon some intensifier screens on eBay to go for a few bucks each sometimes, but I hadn’t looked recently (might be now completely different).
Regards.
In addition to my previous comment, I’d like to advise that you beware and steer clear of calcium tungstate (CaWO4, scheelite) screens, these are often 30-40 years old and not very sensitive at all (emit a faint dark blue light). I had these at first, they were East German “PERLUX” screens, mentioned in my 6VS1 experiments article, and they sucked.
If you can, grab green, rare-earth-based screens. Photo films and CCD sensors are generally more sensitive to green than blue, too.. depends on the wavelength though.
Hi, what is the exact voltage/current have you used here for the cathod of the Chirana? I have tried
with 2V but it seems too low. Thanks.
Hello,
I have lot of interest in your work. That’s great. I’m working on Xray system too.
Do you know where we can get this kind dental Xray tube?
Thanks in advance
Either from your connections – cheaper but much luck and patience is required, or through auction sites, where it’s going to be expensive as people fight over such items.