Some five years ago, I had a RepRap 3D printer setup running the Marlin firmware on an Arduino Mega 2560 board. With that long gone, I was thinking about some other projects I could try on it: a floppy drive controller, and perhaps a clock, with some neon indicators I have managed to salvage from a 1970s benchtop multimeter of Czechoslovak provenience. Even though I have to admit that it does sound a little bit awkward to use an MCU board with 70 I/O pins to power up something so complicated and computationally expensive as a clock… so I made mine a tiny bit unorthodox 🙂
And the very first “unconventional” thing to start with: the nixies are discretely driven here, no special driver chips are used. Even though the machine these tubes were desoldered from used a 74141-based decimal driver, I have decided to put the plethora of Mega2560’s GPIO pins to use… each pin per cathode. Is it wasteful? Not that the circuit is going to deviate from being a clock anyway.
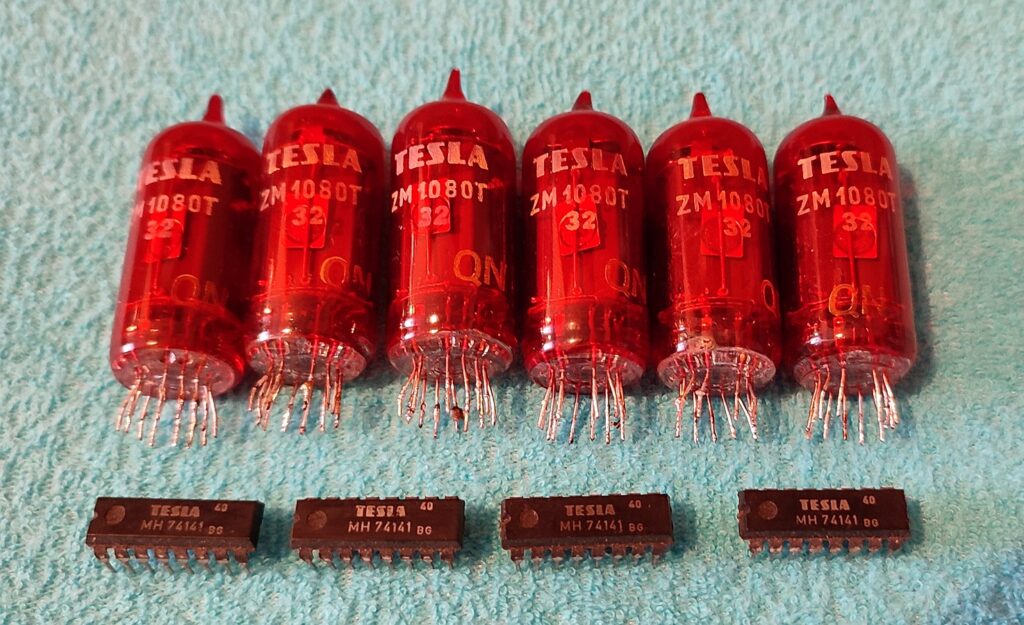
 Desoldered Tesla ZM1080Ts, with contrasting paint still intact and complementary driver ICs (unused)
Of course the GPIO cannot be wired straight to the cathodes of a nixie, due to their operating voltages being somewhat (read: much) higher than the TTL levels of the MCU. Thus, each cathode is connected to the MCU via a small signal transistor of a suitable C-E voltage, such as the MPSA42 (a lot of 100 of these can be had for around three dollars); also old “video amplifier”/output stage transistors can be used, such as the BF258, BF458 and the like.
The transistors are driven common-base per each nixie; there’s only one base resistor per tube, and the MCU pulls the emitter of the active cathode down to light it up. As such, this setup can be used to drive the nixies with a cathode current of up to 10 mA, which is more than enough to light up even the big bulbs, at least for a clock configuration.
 50Hz AC line clock used as a time signal.
On the left: halfwave sine straight from a diode clamp, right: output of a NE555 used as a Schmitt trigger.
Since the Mega2560 board is usually fitted with a ceramic resonator for the 16MHz operation of the MCU, the internal timer functions cannot be used to track time accurately. As such, there are many options to mitigate this: swap it with a crystal, add in a custom RTC module, or…. just use the AC line as a clock signal itself. The nixie clock already runs from the mains, as the required operating voltages for the tubes are not going to appear out of the blue, and much of (continental) Europe is synchronized – besides, there’s a good chance your oven or microwave is still using this approach to track time. And the long term accuracy is actually not that bad either.
 And perhaps add in a small radio controlled module to set the time for you
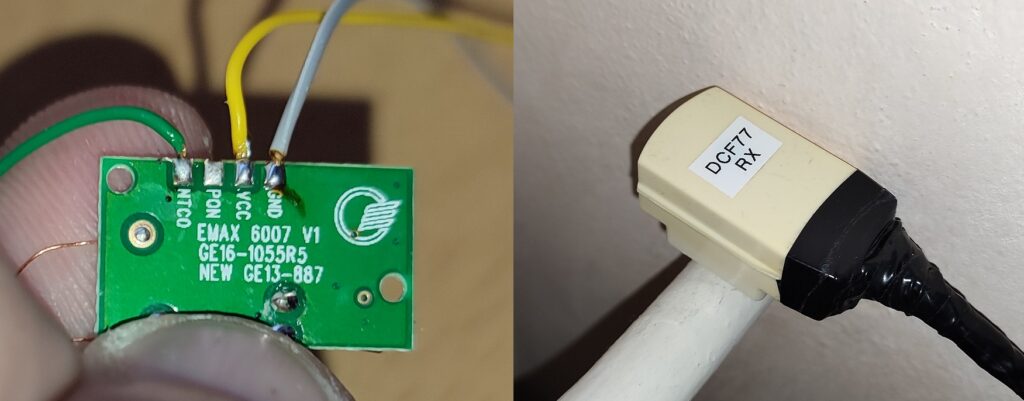
In addition, the code for the board provides for a radio time module (in the current code revision, the Frankfurt time signal), instead of setting the time manually with buttons. Pictured above is the PCB of such a module that can be obtained from the “Far East” for around three dollars a piece, or dismantled from cheap battery powered alarm clocks found at discount stores. However, this receiver needs to be put away from the nixie clock for a good signal reception, otherwise it will not sync to it. My code uses Thijs Elenbaas’ simple DCF library, there’s also Udo Klein’s implementation which can work with a noisy signal. For it to work properly however, the Arduino board requires a crystal instead of a ceramic resonator, and it can take very long (sometimes even hours) to sync up, so it kind of defeats the purpose here. Best to move the time signal receiver away from sources of interference – I put mine inside an old phone plug, made a magnetic mount and hid it on a radiator pipe 🙂
 With a good time signal quality, the clock will sync within 2 minutes upon powerup
All in all, even though the circuit is relatively simple and it can be used to drive both small and big indicator tubes alike, it has a couple of drawbacks, which can be easily addressed if desired.
This clock uses 230V AC line straight; both to power the nixies and as a clock signal itself. As a consequence, all parts of the chassis are live, including the USB of the Arduino, and will present a shock hazard if touched; plus, introducing ground (earth) into the circuit will short out the bridge rectifier. The circuit is fused to prevent visual and sound effects from happening, however, it can still damage the PC and anything with its connected accessories, introduced into the circuit while the power is on. Same goes attempting to probe in with a grounded oscilloscope – take care.
This is easy to mitigate by using an isolated power supply to power the nixies, such as a transformer, and to use a separate low voltage winding for the time signal. With all fairness though, a nixie tube requires around 170 volts to cross the ignition voltage. The construction still needs to prevent live parts from being accessed, regardless of the circuit being isolated from the line or not.
 It says “off-line” because it really is running off the line, like a 1980s TV set.
The Schmitt trigger and the DCF module are all optional, though recommended.
Skip out the signal relay if you don’t want a digital clock that goes tick tock. 🙂
Code for the Arduino is available here
The Schmitt trigger is used to filter out the clamped sine wave; a simple NE555 circuit was used in place. The clock will happily work without it, however, it will be susceptible to line noise from fluorescent lighting, sparking switches, poorly filtered inductive loads and such. When that happens, the clock will gain time due to false zero crossings.
With a clock using the AC line for timing, the time will usually be a couple of seconds late during periods of high load, when the frequency dips down; this will then be compensated by a higher line frequency during the night, to even it out. Needless to say, this circuit has no point of being powered from an inverter or some isolated network – the error is going to be too high for the clock to show any practical time value.
For a clock, the operating current per nixie should be chosen the lowest as it will reliably go, that is, with all digits (cathodes) lit up at the lowest brightness, but still uniformly.
With a 230 volt line RMS, which is around 320 volts peak minus the drop on the bridge, and a nixie glow discharge maintaining voltage between 120 to 150 volts (check this in a datasheet per particular tube), the circuit above sets a current of just slightly above 1 mA for a single ZM1080T. These have their operating current range between 1.5 to 2.5 mA with a recommended value of 2 mA, but for a continuous operation, decrease this to the lowest possible value to reduce cathode poisoning. For this, I had a cycle in code that went through all connected cathodes each minute, but since the ZM1080s are wire-ended (designed to be permanently soldered in), and the Mega board does not have all 10 cathodes of each tube connected, this idea was scrapped, and the way of going with the lowest current was chosen. If your tubes can be socketed (which means they can be used somewhere else), then connecting all cathodes for regular anti-poisoning cycles might help.
For higher currents up to around 10 mA, it is to be remembered that the MCU needs to sink the required current in the common-base configuration. Also, the wattage of the anode resistors needs to be increased appropriately. With 1 milliamp per tube, small 0.5W 150K resistors are perfectly fine; ten milliamps will require a 4 watt, 15K resistor per tube.
Inside the code, there’s a definition that allows to switch to a 60 Hz AC line. Bear in mind that the circuit was made to run on 230 volts – rectified 120VAC might not be enough to even reach the ignition voltage of a nixie.
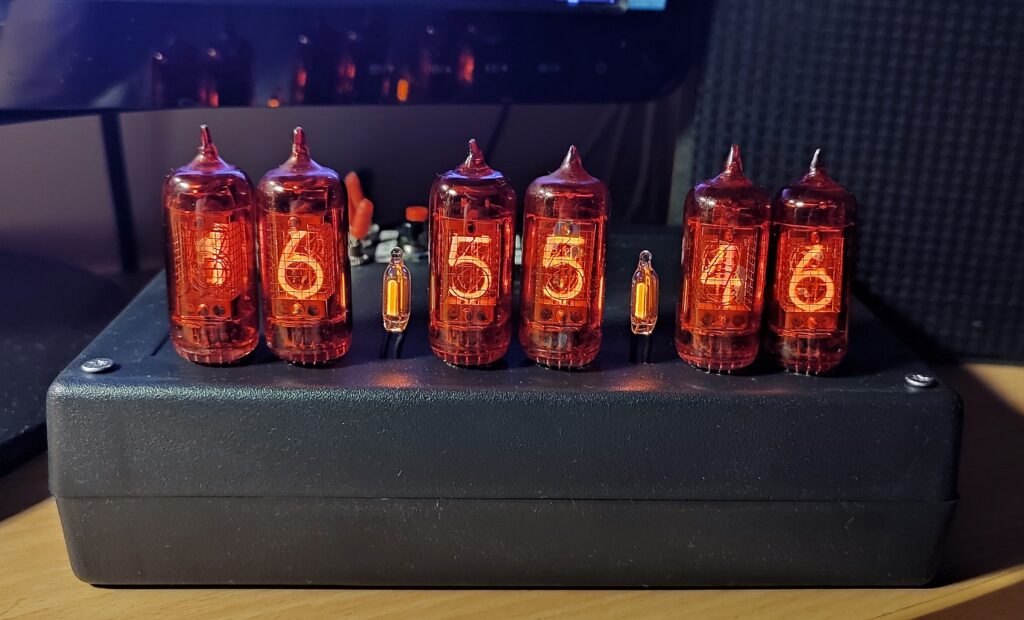
 Soldered in, 2 neon lamps as seconds indicators.
During time setup mode, the lamps also show the quality of received time signal – if present.
The operation is, of course, very simple, as in a normal digital clock – once the board is powered on, the clock goes to time setup mode, with all digits showing 00:00:00. An increment button is used to set hours, minutes and seconds, a separate Confirm button is used to confirm each setting. For rapid increment, the Increment button is held down. The value which is currently being set up will blink at a regular interval. Confirming seconds will start the clock, with the seconds indicators (neon lamps) being on and off every even and odd second respectively; flicking the “tick tock” switch will actuate the relay solenoid each second. Holding down the Confirm button for more than 2 seconds will reset the clock. If the time is not set within 10 minutes, e.g. after a power outage, or there’s no valid time signal during that period, all cathodes are turned off until resumed by the Increment or Confirm buttons, or until the clock obtains a valid time signal from the radio.
During the time setup mode, the seconds indicators are used to determine the quality of the received time signal, if there’s a module connected. With a good signal, the neons will flash each second regularly, and the clock will usually sync up within 2 minutes from powerup. If there’s no module present, or the signal is weak, the glow lamps will not flash at all. Consequently, if the signal is noisy to be unusable for sync, the glow lamps will blink randomly until the time is set manually, or until the reception gets better.

