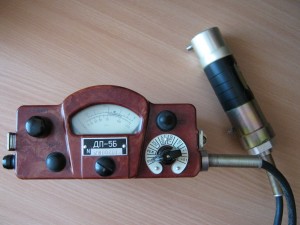
Description: Soviet army Geiger counter.
Manufacturer: Unknown
Made in year(s): mid 60s-early 80s
Country of origin: U.S.S.R.
Status: Working, last calibration March 1990
The DP-5B, or ДП-5Б in Cyrillic, is an army radioactivity contamination (radiac) intensity metering device used in the former Soviet Union. This meter is a true, remarkable relic of the Cold War – originally designed for army measurements after a nuclear explosion – it has been extensively used in cleanup operations after the Chernobyl disaster.
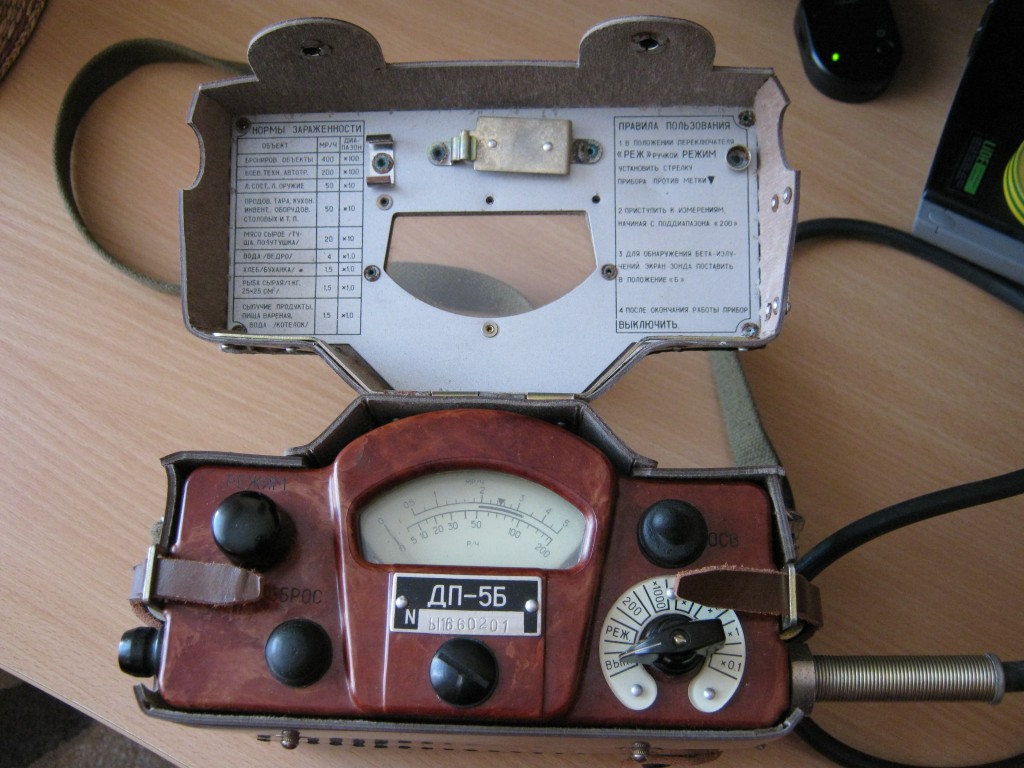 DP-5B in the faux-leather case
As you can see, it is a typical product of Soviet military engineering; being rain- and water-proof with emphasis on mechanical stability, ease of service and straightforward usage: “switch on and measure”. In layman’s terms, it is built like a tank, withstands harsh manipulation and even after 50 years it is still capable of some preliminary measurements.
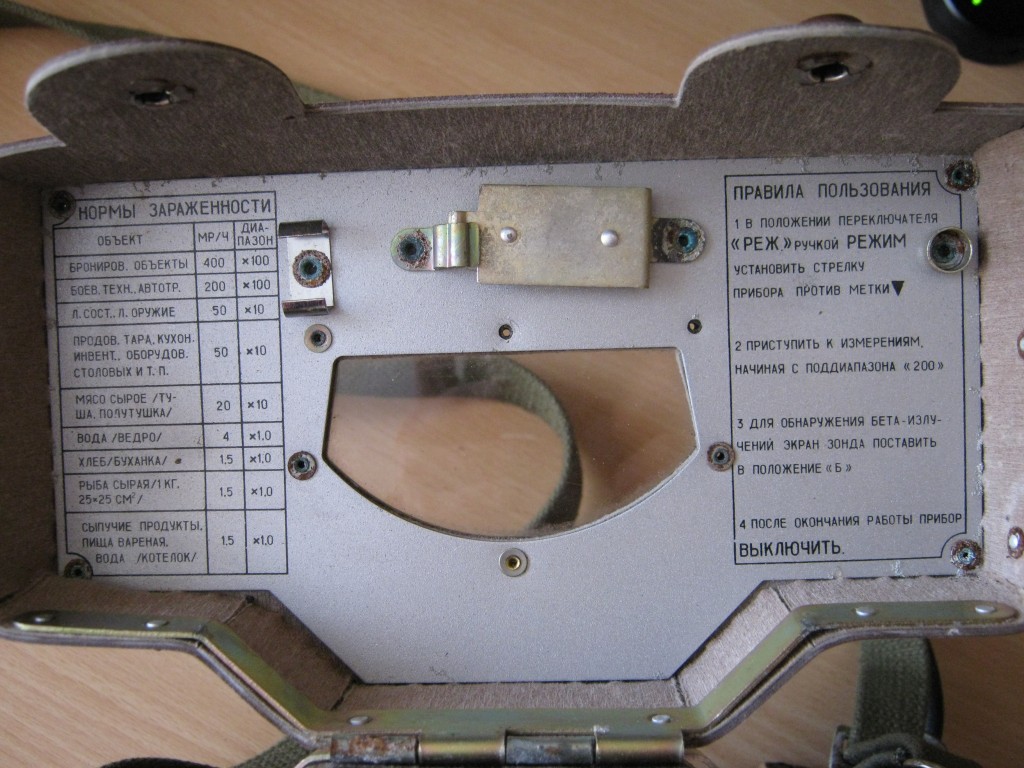 Instructions and maximum wartime food irradiation
Several versions of this meter have been produced. The first, marked just DP-5, had 2 separate scales for beta and gamma decay. Then, DP-5A and DP-5B followed; these two were almost exact in their outlook, however allegedly different from the original DP-5 in their internal circuitry. The “newest” revision, introduced in early 1980s, was the “ugly green” variant DP-5V (ДП-5В in Russian), incorrectly transliterated as DP-5B, which had been built into a case made of more modern plastics. Along with some small changes, this version had a JFET auto-tune circuit; since the original DP-5(A,B) variants have to be manually tuned before proper operation.
Unlike the Czechoslovak IT-65, this device has a simpler internal circuitry and thus is less convenient to work with. Being a classic Geiger counter, it has a second Geiger-Müller tube for measuring high levels of contamination, as opposed to IT-65’s ionisation chamber. The meter operates in 6 ranges and has a gauge with two scales: 0-5 mR/h, which is active when the rotary multiplier switch is set to “x1000” down to “x0.1”, and 0-200 R/h when the switch is set to “200”, as follows:
0 to 200 R/h: “200”
0 to 5 R/h: “x1000”
0 to 500 mR/h: “x100”
0 to 50 mR/h: “x10”
0 to 5 mR/h: “x1”
0 to 0.5 mR/h: “x0.1”
This system might have some drawbacks when it comes to calibration, may sound complicated at first and the measurement takes longer than with the IT-65, however it is vastly superior to IT-65’s tiny logarithmic scale, as you are able to obtain much more precise values. The time base of the measurement is also longer: this has the advantage of the meter keeping its reading until re-set or switched to a different subrange, so that the needle keeps its position even if the device is shaken or subjected to shocks.
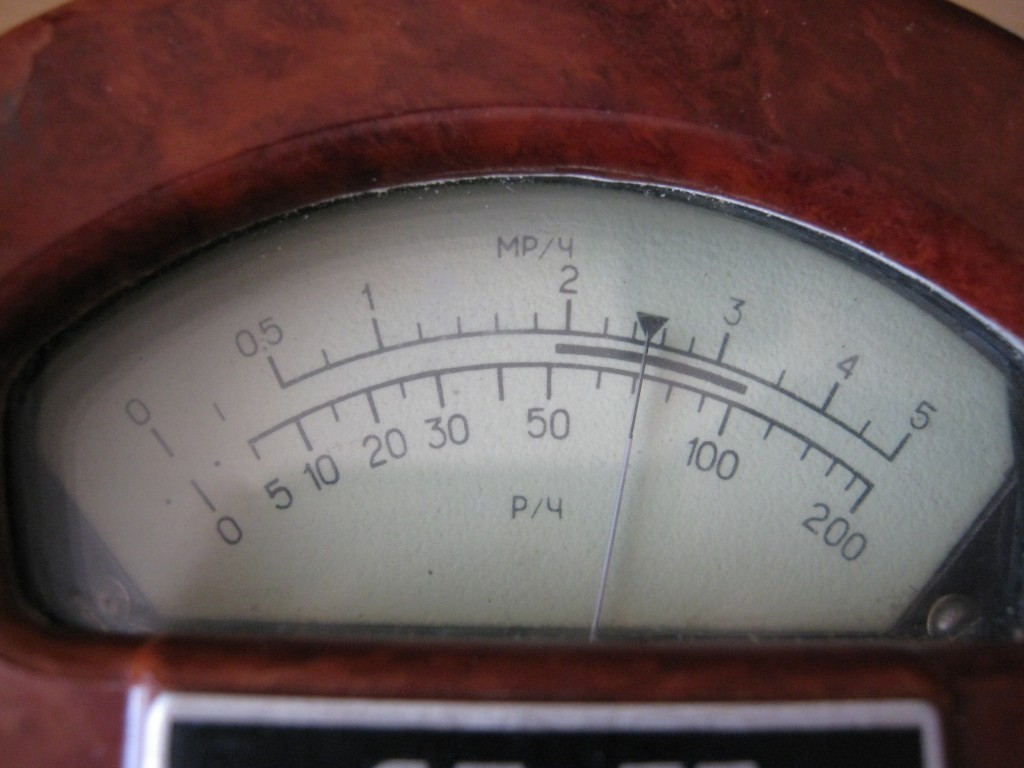 Manual calibration after powerup
The DP-5B operates on three obsolete 1.5 volt Soviet batteries. Two of them are in series for the high voltage and detection circuitry, one powers up the scale illumination. These batteries are no more in production. However, with some cardboard and aluminum foil, it is possible to make your own “adapters” for today’s AA cells. Or, alternatively, you can dismantle a 4.5V battery pack, unsolder the cells which are inside and wrap them in some insulation tape, as I did. These cells are exactly the same length this meter accepts.
After powering up, it is mandatory to calibrate the needle to the black triangle marker, which is printed on the scale. This is done by switching the meter to РЕЖ mode and using the РЕЖИМ potentiometer for calibration. If this is not possible, the batteries must be replaced, as the internal inverter is not able to reach the operating voltage. After that, the meter is usually switched to the lowest range (x0.1) and it’s ready. If the needle goes over the scale while measuring, the multiplier is switched one range up and the СБРОС pushbutton is pressed to zero out the over-scaled reading.
As mentioned above, the scale can be illuminated using the ОСВ switch. However, there is also some fluorescent glow in the dark zinc sulfide (ZnS) lacquer paint, which is present on the dials. They glow in the dark if exposed to daylight or artificial UV.
Like with the IT-65, the probe can be switched to measure beta and gamma, or gamma radiation only, by rotating the metal shield. However, the two Geiger tubes which are used here, cannot detect alpha radiation due to their design. A SI3BG, made from glass, is used here for the “200” range and a SBM-20, made from metal, for the other ranges.
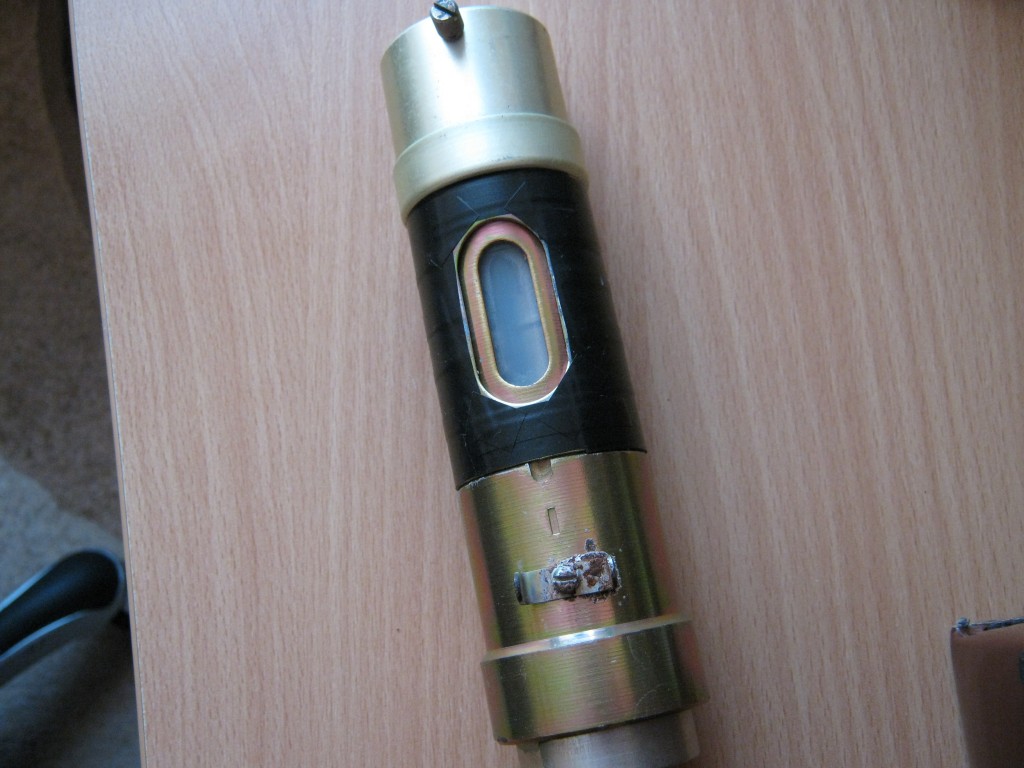 Beta and gamma detection, shield open
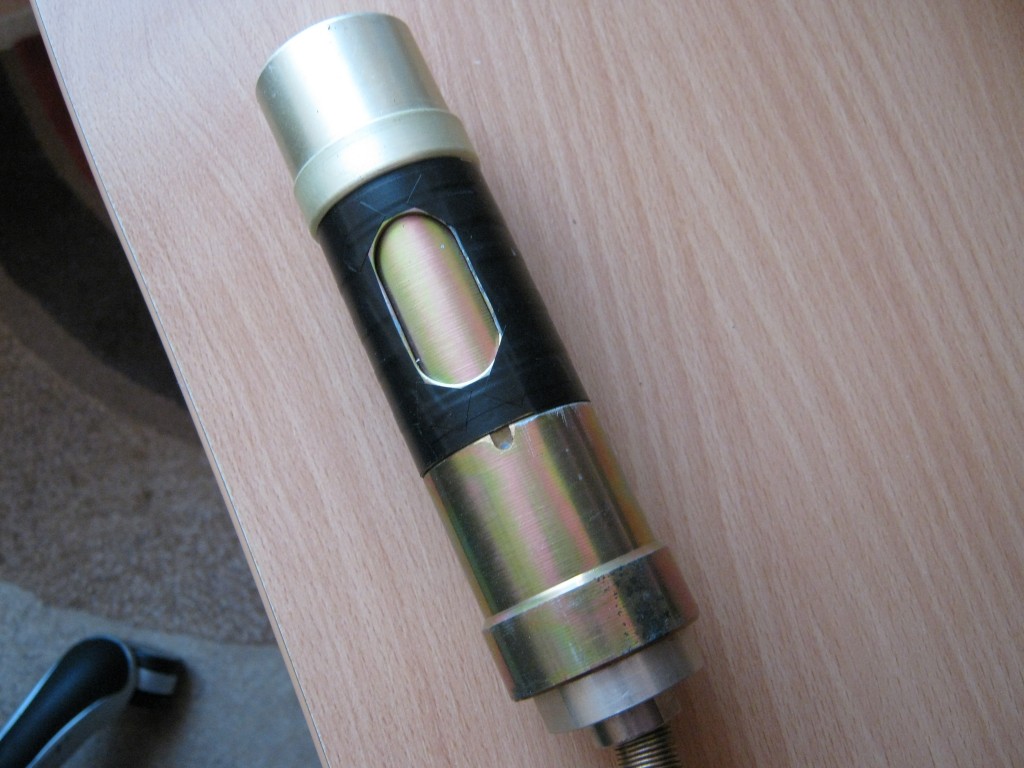 Gamma only detection, shield closed
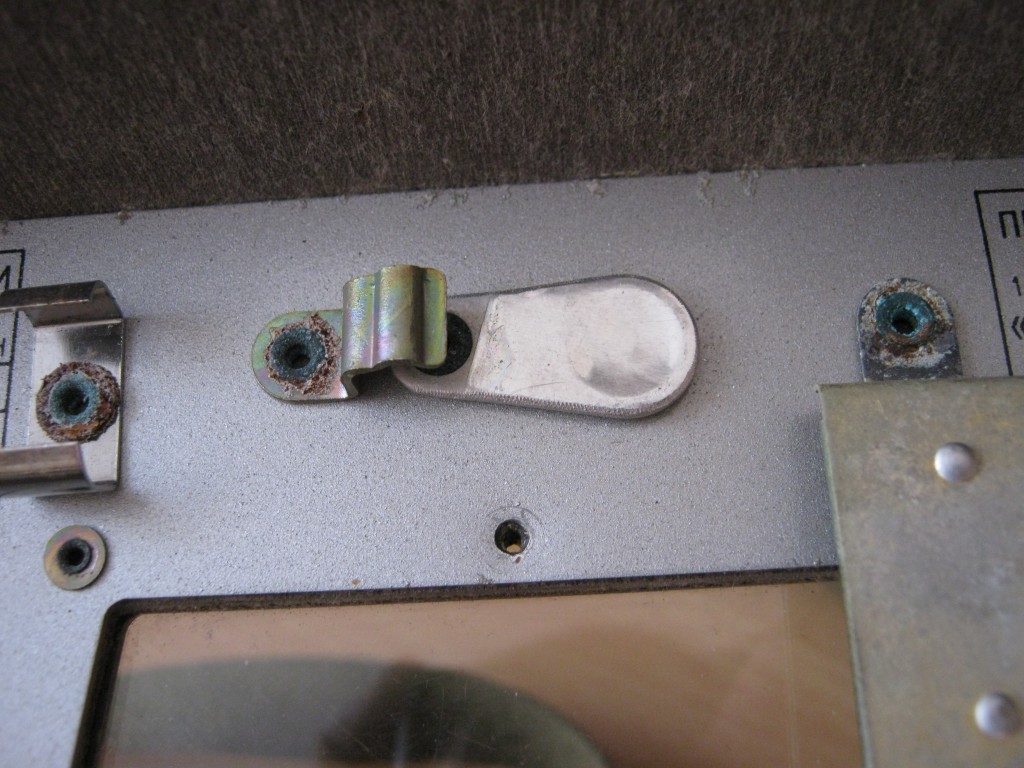
My meter, despite being over 50 years old, is still in fairly good condition and when compared to my IT-65, it still shows quite accurate readings. However, some oxidation and rust is present on the rivets and on the metal probe. You might have noticed the black insulation tape on it – it just looks better this way 🙂
Accessories included: an exhaustive instruction manual in Russian, complete with parts list and explains servicing, a log and calibration book, 2 spare lightbulbs and rubber caps for switches, some weird-looking (but very comfortable) headphones, and an extension rod mount for the probe to measure radiation at ground levels. A strontium-90 control check source is present at the top of the case, covered by a metal sheath. Because of age, it gives off just 5 mR/h from close proximity.
The total weight is something over 3.5 kg including accessories.


Good
When it was new (Strontium 90) it should to show 20mRh on the dial.
im having an issue with mine where after calibrating and switching it to any measurement it immedietly maxes out, im using a AA battery and two 1.5v batteries to power it, i just got it on tuesday and its cold, does temperature affect these?
If you were able to calibrate the meter to the inverted triangle, yet it maxes out on both the 200R/h and x1000-x0.1R/h ranges, you will need to replace the ТХ4Б cold-cathode thyrathrons. Also check both Geiger tubes, if possible, e.g. with a 400 volt source, put in series a 3 meg resistor, the tube and some 4000 ohm headphones. You should be able to hear individual pulses of the counter tube, or use some control check source (especially on the SI3BG highrange tube)
Hello guys,
I have a DP-5Vb which i understand is a civil version of the military counter.
It doesn’t have the calibration potentiometer, however, it has the two tubes in the measurement head.
Because I have no readings, I checked the voltage on the tubes and, measured with a digital multimeter, there is a 264 V present at the tubes terminals. I think it is a little too low for the tubes to work OK.
Now, the unit has a test range on the uAmmeter which is OK when I test.
I also put headphones and, when I probed the voltage on the tubes, I had spikes in the headphones and the clamping Neon tubes in the measurement probe briefly lights.
I assume the DC/DC HV converter is the same with the DP-5b model and I kindly ask someone to help me with the schematics.
Thank you very much,
Adrian
Any idea where I could get a replacement part for my dp-05v? Bought unit sadly not working managed to take it apart and I found that component ‘C11’ on main board is snapped in two.
Hi, The C11 in a DP-5V (the green variant) is a 6.8nF capacitor rated for 1 kV. You can get these in any store that sells passive electronic components.
Thank you, hopefully I’ll get the old girl working again
I have a dp5b but i can not calibrate it,the needle goes up to 5 then stops and beeps at max adjustment ….I use AA batteries inside a piece of gardenhose and the negative prong bended for Good Contact..at least i thought so…..do i must connect earphones when calibrating?you have any ideas?/Stephan Höglund
If the needle in the meter goes always over the scale no matter how you set the “РЕЖИМ” knob, the “corona stabiliser” (the special glow lamp) is most likely to be shot, or there’s a short circuit inside the probe (the meter should allow calibration to the triangle marker even without any GM tubes present in it).
When i turn the knob it goes down to zero but when i turn it toward the supposed mark it comes up to 5 and STOP there,it dont go any further.
So it never goes past the scale then? Desolder the potentiometer and replace it with a new one temporarily, or inspect the progression of the old one with an ohmmeter, it shall go smooth without any significant “crackle” (rapid alterations of value while rotating slowly).
It is in the scale,can be adjusted between zero and 5…..it is a New Old stock dp5b……got stucked i guess in the potentiometer then
Or there’s nothing wrong with your meter at all – you’re just twisting the knob like a maniac. Turn it on, give the needle in the meter time to stabilise… and then rotate the knob very slowly to get to the triangle marker. Do further adjustments only after the needle has finished moving. Since your meter responds to the knob and can be set “between zero and five” as you write, with this way, you won’t overshoot the triangle marker. Common sense, ain’t it?
BTW you don’t have to bend the contacts in the machine. The 3 cells from a box 4,5V battery fit right in, without any tinkering.
Thank you for your reply,i Will try to find a 4,5volt battery and try Again!
Update on the progress with my dp5b,i installed batterys and tested it Again….it seems to work but it starts very slowly i forced it to measure and it beeped like crazy,then i adjusted Again, i used some Contact oil under the knob for the potentiometer….it was a bit rough at first but it seems to work now.
Thank you for your help!
/Stephan Höglund
The device cannot beep, there’s no speaker in it.
That was strange!…..wonder what is beeping or squeeling then?
It varies in strength with the adjuster knob
There’s a 400 volt inverter operating with a variable frequency of ca. 800Hz to 4kHz that is set with the calibration knob. This can be heard as a very faint persistent whine that is constant on all ranges while turned on, adjusting the knob should also adjust the “pitch” of the sound that you are hearing. It is not a “beep” per se, there’s nothing in the machine that would make it beep.
But if it is squealing loudly, perhaps it’s hungry… try feeding it, or make bacon out of it.
Try following this video tutorial that demonstrates turning the machine on by rotating the switch and the calibration knob. Should be simple enough. Or get the newer green “V” variant; compared with this variant, no rocket science degree is required to turn that meter on.
Hmmm,well i do have such dp5v also have not tested it yet…but i have indeed tested my dp66m and dp75 and they all behave as they should.
Soon i Will test my mobile radiation warning systems dp3b and the dps68m1 together with its test unit…the radiation imitation unit aip68.
/Stephan Höglund
Is the check source dangerous and dose it contaminate the detector
Hello! Thanks for your very informative site and videos. I have recently acquired a DP-5A which works, but has a fault I can’t seem to diagnose or fix. May I ask a few questions?
Here’s the symptoms: I am using AA batteries with spacers to power the device. That seems satisfactory. I turned the dial to the voltage setting and adjust the voltage to the proper point in line with the black triangle. I then shift the selector switch over to a sensitive setting, usually 1X or 10X. I open the beta shield on the probe and test a check source–either a thorium-rich camera lens, or a piece uranium glazed “fiesta” china. With the headphones plugged in, the DP-5A registers on its meter and has a crackle in the headphones. Then, randomly, the dial needle swings hard over to the right and pegs. A squeal fills the headphones. Pressing the reset button will send the needle back to the left, but as soon as I release the reset it surges back to the right. The squawling in the headphones does not change during this process. This effect does not always happen right away. Sometimes several minutes of proper operation pass, then it goes awry. Sometimes it goes wrong almost immediately.
I have, on advice from others, replaced the diode (Part 16) with a modern silicon diode 1N4007. No effect of the problem. I replaced the Corotron (Part 36) voltage regulator with a modern solid state replacement (400 volts). This seemed to help a little, but the problem still occurs. I plan to replace the capacitor (Part 19) when I get a replacement I ordered from a supplier in Bulgaria.
I did an interesting test. I removed the CTC-5 Geiger tube from the probe and operated the device as normal. Of course there was no signal input then, but after a few seconds the same problem happened–needle swung hard to the right, squealing in the headphones. From this I take it the problems does no lie with the Geiger tube.
Any help in this matter would be greatly appreciated.
Paul
I think I’ve solved it, finally. The fault lies with the high range GM tube, the small glass tube. With it removed from the probe, the device works properly and does not go off scale and squeal. This is with the selector set on 10x or higher. On 1X or .1X the needle still buries itself. I suppose this is a matter of adjusting the calibration pots . . . ?
Anyway, the DP-5A now works at least 90 %.
I would have just returned the thing and obtained another one 🙂
Check the SI3BG tube on a separate DC supply with e.g. high impedance headphones in series, and a control source in very close proximity (no matter what range you should get at least one or a few pulses per minute).
From the description you’ve written about, the inverter part might be going awry. Check and replace appropriate capacitors on the secondary side, not sure now whether the thing has any electrolytics – better get an ESR meter and measure them all.
So what’s the difference between the A and B model?
I read somewhere that the B model “has its gamma radiation detector integrated into the case”. Or do they mean that it has a check source inside the leather case?
Are there any other differences as well?
The A and B versions are similar; I didn’t see the circuit diagram of the A model, but the case and front panel markings differ a bit. The A variant also has an extended probe handle… both variants have the Sr-90 source welded to their carrying case.
The green V variant, which is modernised, has its check source integrated inside the probe.
The Strontium source is also a rare find.. The PDR-27T’s were originally supplied with VERY hot test sources capable of up to I believe 50 mR/Hr for calibration of their high test probe (it has a piggy back configuration), however mine doesn’t have the test source. I was lucky enough to find one that came with the backup Geiger tubes of both ranges, as well as the low temp battery holder and high impedance headphones. I have not yet been able to design a circuit to turn the high impedance output headphone output into something that could be easily routed to a clicker like a CDV-700 for instance. I now use a SMB-20 tube in a custom built counter for my daily usage, but it’s still cool to break out the US Navy mil-spec counter every now and then 🙂
Hi,
these “B” variants had their check source spot welded to the carrying case as you can see; the newer variants had it inside the rotatable probe sheath. Whether it is ripped out or not, depends on the seller, and also on the way he acquired his stockpile of meters. Care must be taken so that the source was behind the sheath during storage so it didn’t rust through, or else it could potentially contaminate the carrying case.
The hottest check sources were mostly inside vacuum-tube based “roentgenmeters” (ionisation chamber based, high range meters). There are a few Russians dismantling these, on Youtube. Even after the years, the decay can even be observed on camera as random pixels hitting the CCD. Then again, they are perfectly safe if in a metal enclosure, as Sr90 is a beta emitter.
Awesome layout. I would love to own one of these. I have a PDR-27T from the US Air Force that is fairy accurate from the 80’s, but it doesn’t have the icon that these meters have. On watching any Chernobyl video’s, they are all using these meters to measure what they assumed was a malfunction until they were really told what was going on back in ’86…
tanks